
66 Block Wiring Instructions
Snap the 66 wiring block onto the 89B mounting bracket. 1966 Ford Truck Wiring Diagrams.

Pin On Diy Tips Tricks
They have been manufactured in three sizes A B and M.
66 block wiring instructions
. These directions will be easy to grasp and use. A and B have six clips in each row while M has only 4. Wiring a 66 block with Category 5 unshielded twisted-pair cable requires a different termination method not typically used with voice-grade cables.55 Ford Wiring Manual E-Books 66 Block Wiring Diagram Wiring Diagram will come with a number of easy to stick to Wiring Diagram Instructions. 1966 F-100 F-250 Instrument Panel. On 110 blocks the cables are seated in the base of the block and held permanently in place using c.
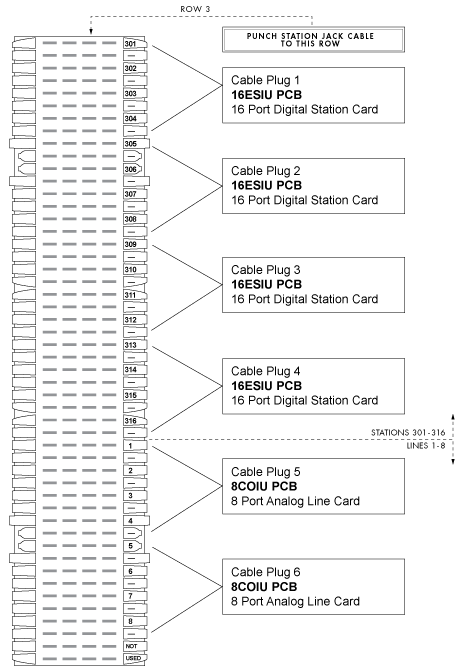
Fuse box shop instructions. INSTALLATION INSTRUCTIONS 50-Pair 66 Wiring Block Step 1. 66-Block Rewiring Instructions From One Rtu Config To Another with regard to 66 Block Wiring.
66 Wiring Block Pre-wired with 2 Female 25 Pair Telco Connectors. To discover all pictures throughout 66 Block Wiring Diagram images. However it doesnt imply link between the wires.
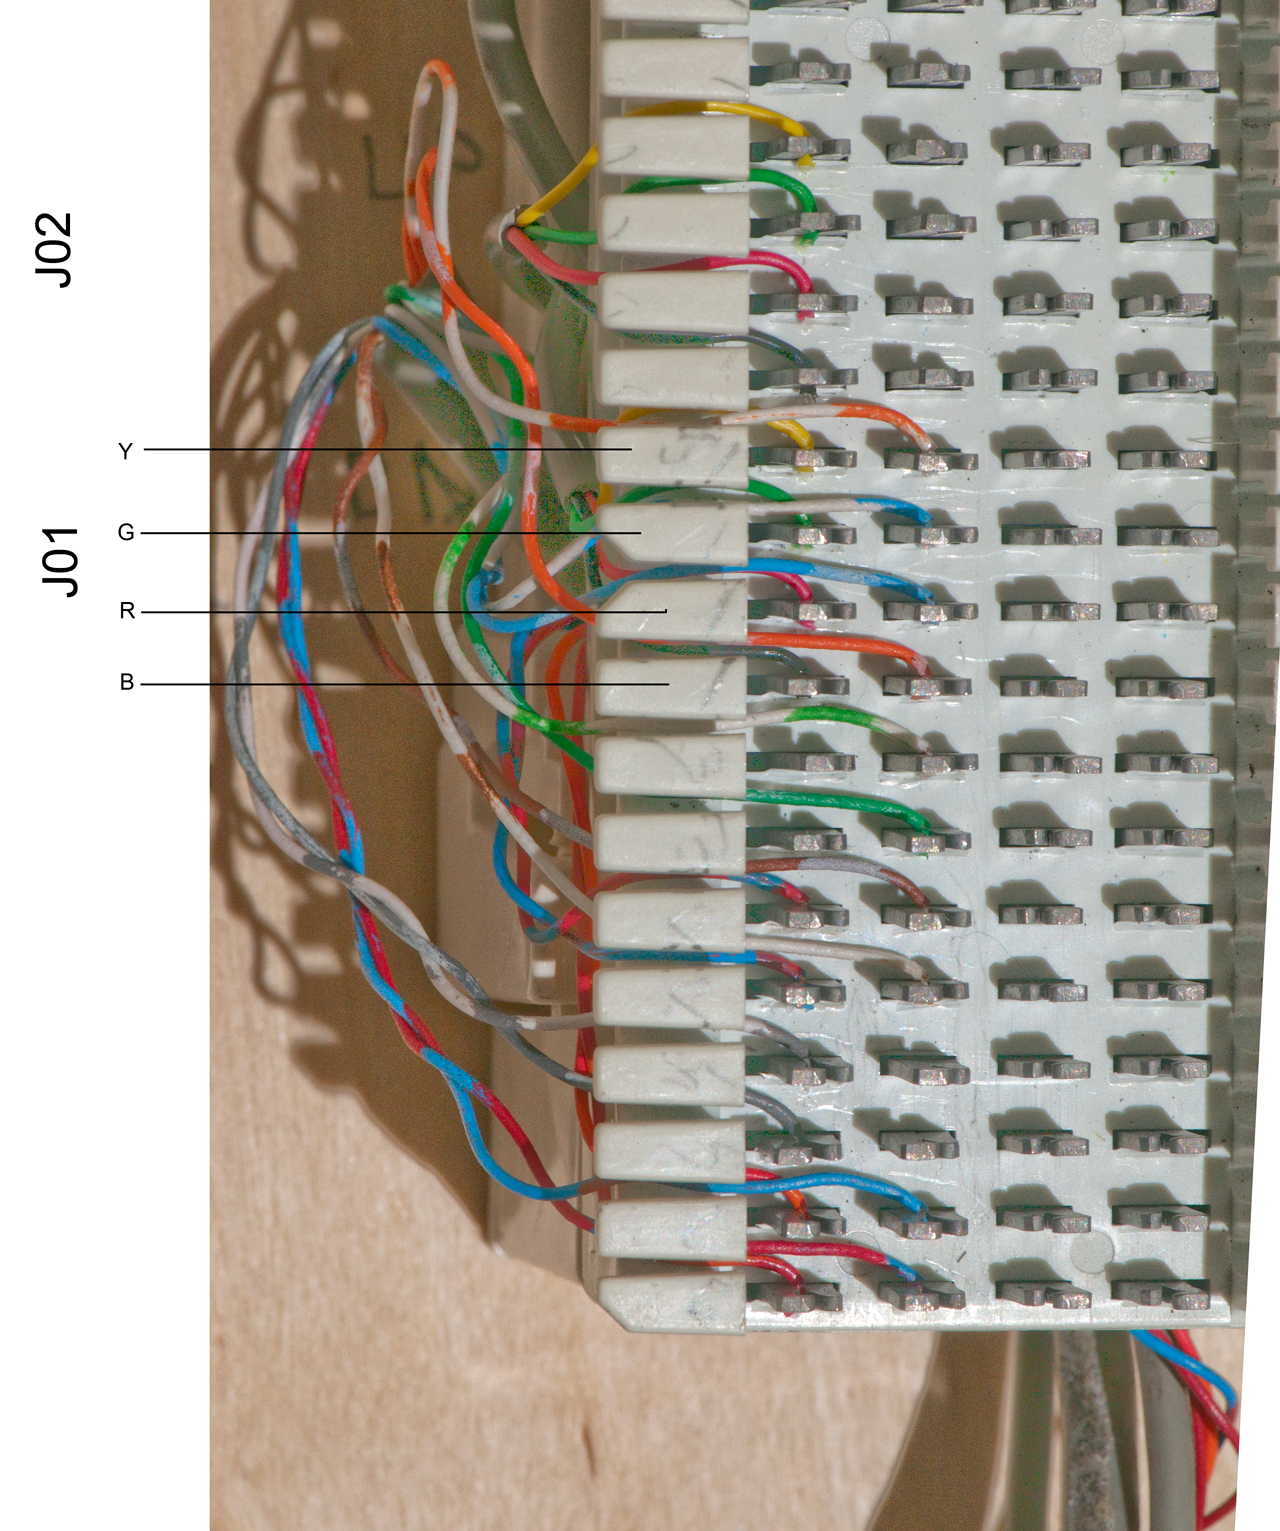
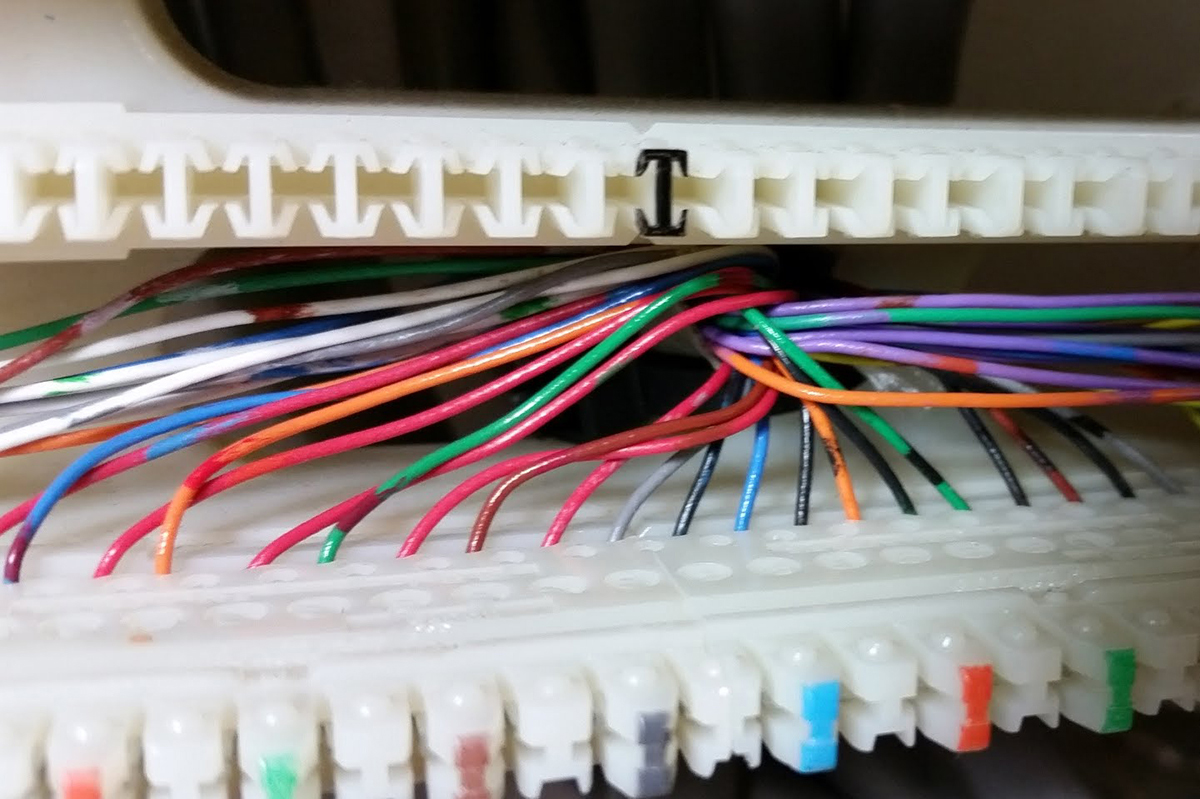
How To Wire A 66 Block throughout 25 Pair 66 Block Wiring Diagram image size 856 X 311 px and to view image details please click the image. How to connect 1-pair copper jumper wires to a 66-block when you do not have access to a punchdown tool. Route the horizontal or backbone cables inside the 89B mounting bracket and feed the cables out either side of the bracket.
The A blocks have the rows spaced farther apart and have been obsolete for many years. Route the horizontal or backbone cables inside the S89 bracket and feed the cables out either the right or the left side of the bracket as needed. 66 - 77 Shop Manual Pages Wiring.
Seat and terminate the input and output conductors using a punch-down tool. 66-Block Rewiring Instructions From One Rtu Config To Another throughout 66 Block Wiring Diagram by admin. Install the S66 block onto the S89-type bracket.
Occasionally the cables will cross. A 66 block is a type of punchdown block used to connect sets of wires in a telephone system. 1966 B- F- and T-Series Ignition Starting and Charging.
Actually we also have been noticed that 25 pair 66 block wiring diagram is being one of the most popular field at this moment. How To Wire A 66 Block with 66 Block Wiring Diagram by admin. So that we attempted to find some great 25 pair 66 block wiring diagram photo to suit your needs.
1966 B- F- T- N- and NT-Series. It is supposed to assist each of the average person in developing a suitable system. Strip back only as much cable jacket as is necessary to terminate the conductors.
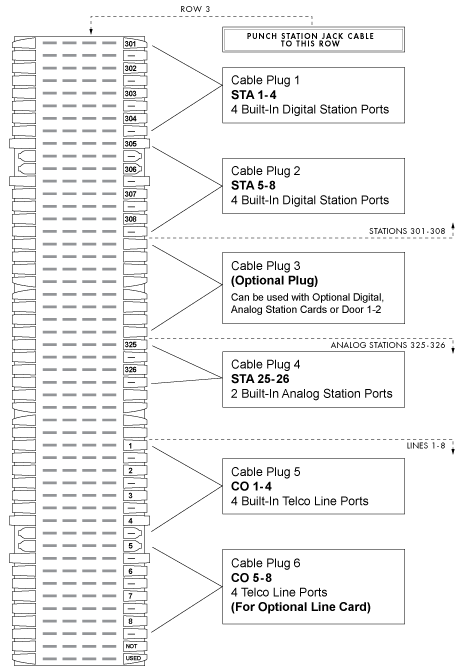
Mount an 89B mounting bracket onto a plywood wall. As stated earlier the lines in a 66 Block Wiring Diagram signifies wires. CLICK HERE to view some notes about this diagram.
Posted by admin at March 1 2015. Installing cross-connect jumper wires. Injunction of two wires is usually indicated by black dot on the intersection of 2 lines.
From the 1966 Ford Truck Body Builders Layout Book - Grayscale version. Snap the 66 wiring block onto the 89B mounting bracket. On 66 blocks the cables are terminated on the outside row of punch lugs and cross-connects are made on the inner lugs.
Mount an 89B mounting bracket sold separately on a plywood wall by using two wood screws. This specific impression 66-Block Rewiring Instructions From One Rtu Config To Another throughout 66 Block Wiring Diagram over will be labelled with. Bracket and mounting screws are sold separately.
Wiring diagram whole truck. This video shows you very up-close the exact and.
Panasonic Kx Ta824 Telephone System
Nec Dsx Installatioin Support Nec Sl1100 Distributors Com
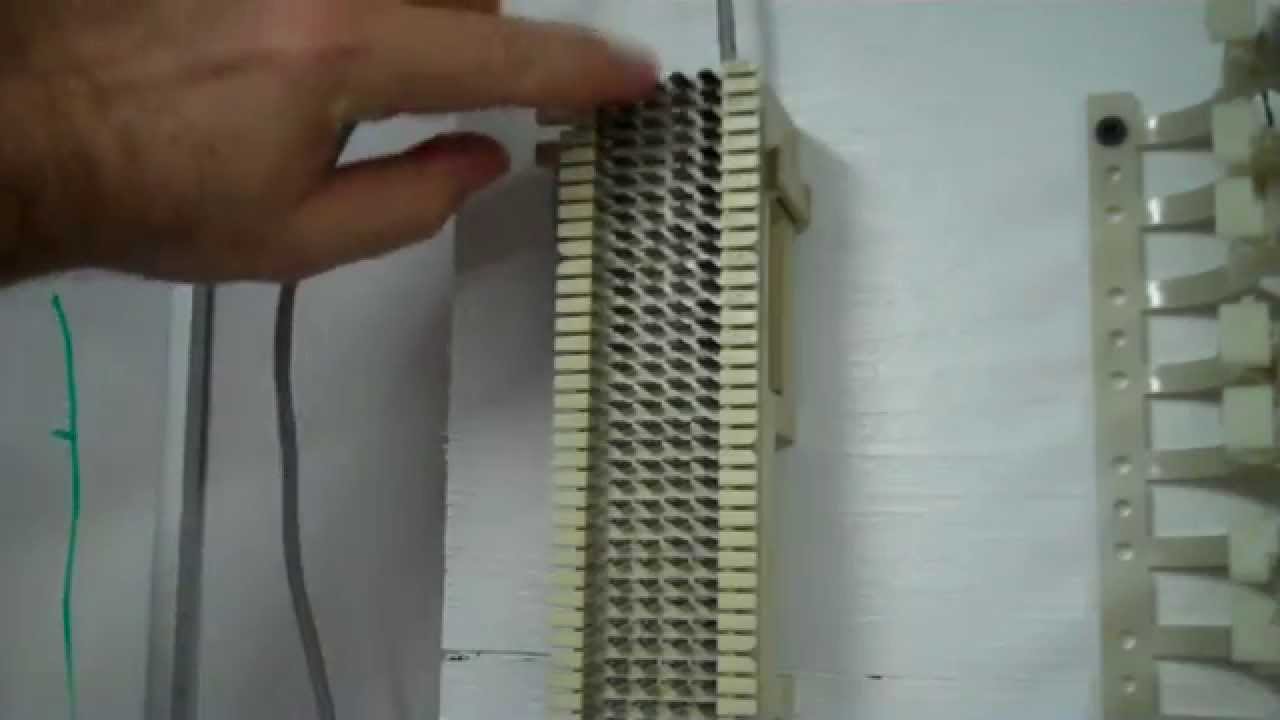
Punching Down 4 Pair Cable On 66 Block Youtube

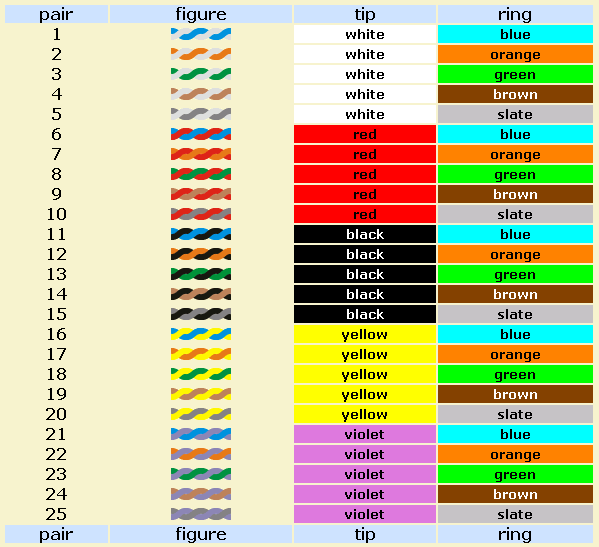
Rj21 Amphenol Pinout Chart Mike S Pbx Tips
Voice Service

110 Punch Down Block What S It How To Use It
110 Punch Down Block What S It How To Use It
Nec Dsx Installatioin Support Nec Sl1100 Distributors Com
Post a Comment for "66 Block Wiring Instructions"